

Cabbage (Brassica oleracea) is widely cultivated in highland areas at altitudes of 1,000-3,000 meters above sea level. However, certain cabbage varieties, such as Green Coronet, KK-Cross, or Gloria Osena, have been developed to grow in lowland areas.
Ideal environmental conditions for cabbage include an air temperature of 20-30°C, humidity levels of 60-90%, annual rainfall of 700-1,000 mm, and soil pH of 5.5-6.5. Cabbage is typically harvested 3-4 months after planting.
With proper cultivation, cabbage productivity can reach 20-40 tons per hectare or 2 kg per square meter. This article will guide you through the steps of growing cabbage, from selecting the right variety to post-harvest handling, to achieve an optimal yield!
1. Choosing the Right Variety
Selecting the appropriate cabbage variety is crucial for achieving optimal results. Popular varieties in Indonesia, such as Grand 11, KK-Cross, and Green Coronet, have distinctive characteristics tailored to farmers’ needs.
Ensure the selected variety matches the climate, soil type, and planting location for optimal growth.
2. Land Preparation

Soil Preparation
Preparing the land is an essential step in ensuring the healthy growth of cabbage. Follow these steps:
- Clear the land: Remove weeds, stones, and plant residues to facilitate soil preparation.
- Loosen the soil: Use a hoe or tractor to loosen the soil to a depth of 20-30 cm and let it air dry for a week.
- Create planting beds: Form beds 100-120 cm wide, 20-30 cm high, and 30-40 cm apart.
- Apply mulch: Use plastic or organic mulch to suppress weeds and maintain soil moisture.
- Adjust soil pH: If soil pH is below 5.5, add dolomite lime at 1.5 tons/ha or 150 g/m², 2-4 weeks before planting.
- Basic fertilization: Add cow or chicken manure at 20-30 tons/ha or 2-3 kg/m². Also, apply NPK fertilizer at 300 kg/ha or 10 g per planting hole.
3. Seed Sowing
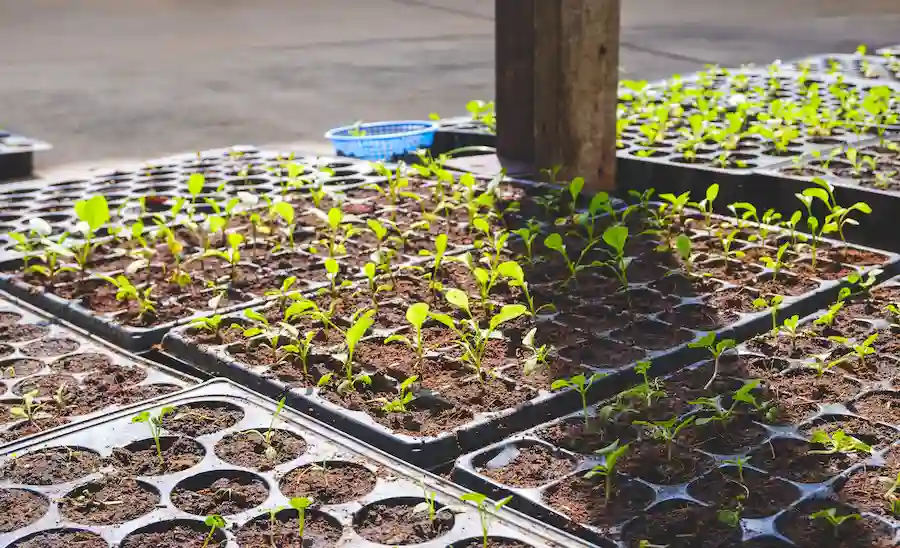
Choose healthy, disease-free seeds from a reliable variety. Soak the seeds in warm water for 12-24 hours to break dormancy, encouraging faster germination.
Sowing Methods
Sow seeds in nursery beds, polybags, or trays filled with a mixture of soil and organic fertilizer. Moisten the medium, scatter the seeds evenly, and cover them with banana leaves for 2-3 days. After 7-8 days, transfer the seedlings to small polybags or banana leaf pots.
4. Transplanting

Seedlings are ready for transplanting to planting beds after 3-4 weeks or when they have 4-6 leaves. Select healthy seedlings with upright stems and fresh green leaves, free from pests or diseases.
- Water the beds before transplanting to maintain soil moisture.
- Dig planting holes 40 x 40 cm or 50 x 50 cm apart, depending on the spacing requirements.
- Carefully transplant the seedlings with their root medium into the holes. Ensure the root collar is slightly buried to anchor the plant securely.
5. Replanting
Replace any dead or weak plants with new seedlings to maintain optimal population density. Perform replanting carefully to avoid damaging neighboring plants, stopping this process after the plants reach 15 days after transplanting (DAT).
6. Regular Watering

Water cabbage plants regularly, especially in the morning and evening, to maintain optimal soil moisture. During the dry season, increase watering frequency to prevent drought stress.
Ensure water penetrates deeply enough for the roots to absorb adequately, but avoid waterlogging to prevent root rot.
7. Weeding
Weeding involves clearing weeds from the field to reduce competition for nutrients, water, and sunlight. Conduct weeding carefully and avoid disturbing the root system to ensure healthy plant growth.
8. Follow-Up Fertilization
Apply follow-up fertilization at 25-30 DAT by sprinkling 300 kg/ha of NPK fertilizer (10 g/plant) around the plants at a distance of 5-7 cm. Additionally, use cow bio-urine liquid fertilizer at 10, 20, 35, and 45 DAT. Dilute 100 ml of bio-urine in 1 liter of water and spray around the plant stems or roots.
9. Pest and Disease Control
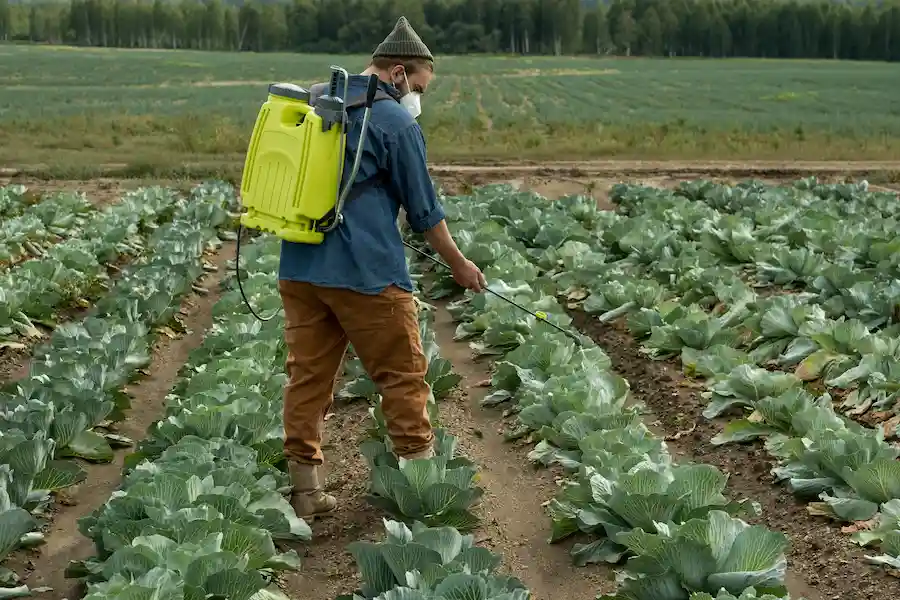
Cabbage is susceptible to pests such as diamondback moths (Plutella xylostella), cabbage cluster caterpillars (Crocidolomia binotalis), and cutworms (Agrotis ipsilon), as well as diseases like soft rot (Erwinia carotovora) and black rot (Xanthomonas campestris).
Prevent and manage these issues by regularly monitoring plants, removing affected parts, and using natural pesticides like neem or papaya leaf extracts. If necessary, apply chemical pesticides following recommended dosages.
10. Harvesting
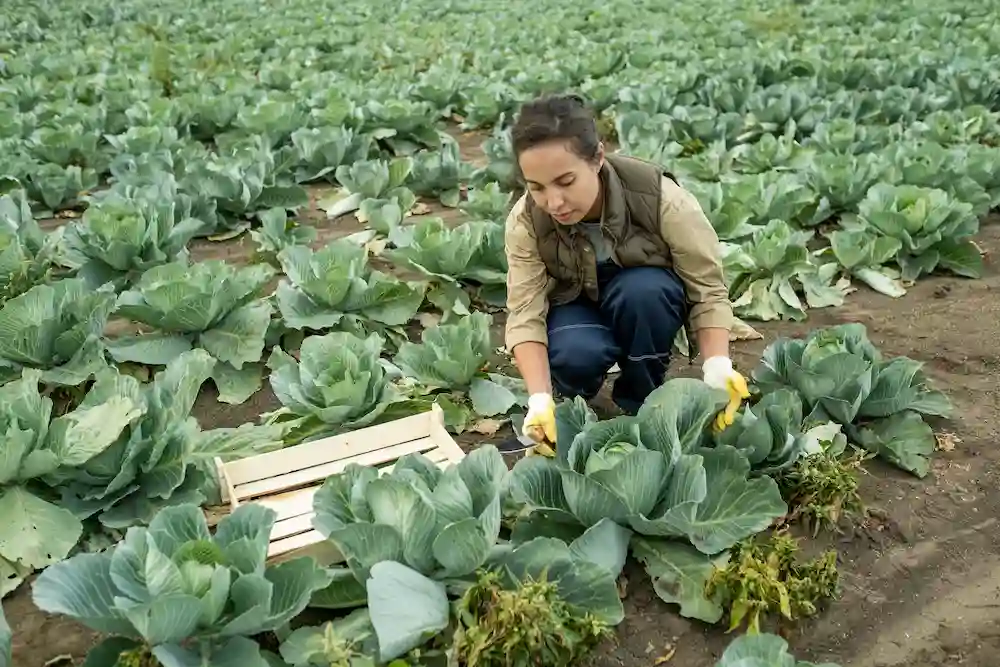
Cabbage is ready for harvest at 75-90 DAT when the head is firm, dense, and makes a hollow sound when tapped. The outer leaves should be shiny green, with some wilting at the base.
Harvest by cutting the head along with part of the stalk, leaving 4-5 outer leaves to protect the head. Store the harvested cabbage in a shaded area to maintain its freshness and quality.
11. Post-Harvest Handling
After harvesting, store cabbage in a cool, shaded area to avoid direct sunlight. Sort and separate high-quality cabbage from non-marketable ones.
For storage, the ideal temperature is 32°F to 40°F (0°C to 4°C) with 95% humidity to maintain freshness and extend shelf life.
Ready to start growing cabbage? Follow these steps to achieve a bountiful harvest!


