

Chili peppers are a type of vegetable that can grow at altitudes ranging from 1 to 1400 meters above sea level, which means they can be cultivated both in lowland and highland areas. The ideal environment for chili plants includes a temperature of 21-28°C, humidity of 60-80%, rainfall of 800-2000 mm per month, and a soil pH of 6-7.
Chili peppers can be harvested 60-75 days after planting. The productivity of chili peppers can reach 20-40 tons per hectare in a single planting season. Chili peppers can be grown in the ground, in polybags, or hydroponically. Below is an article on how to plant chili peppers in the field to achieve abundant fruit production.
1. Selecting Varieties
The first step in planting chili peppers in the soil is selecting the right variety of chili to plant. Make sure the chili variety is suitable for the soil conditions and is not being planted in land that has previously been used for plants from the same family (Solanaceae), such as eggplant, potatoes, tomatoes, or peppers.
The most popular large chili pepper varieties in Indonesia include Tanjung 1, Tanjung 2, Ciko, Lingga, Inata Agrihorti, and Kencana. These varieties are chosen because they produce large harvests, ranging from 12 to 22 tons per hectare, and have good resistance to pests and diseases.
2. Soil Preparation

Before planting chili peppers, the soil needs to be prepared to ensure healthy plant growth. The land preparation steps include selecting a location, clearing and loosening the soil, and creating planting beds:
- Choose a location with loose soil and sufficient space. Make sure the soil has not been used for planting crops from the same family (Solanaceae), such as eggplant, potatoes, tomatoes, or peppers
- Clear the land of weeds or rocks
- Loosen the soil using a hoe or tractor to a depth of 30-40 cm.
- The land should be exposed to sunlight for 2 weeks before planting to allow soil-borne pathogens to die off and prevent them from infecting the chili plants
- Create planting beds that are 30-40 cm high, 100-120 cm wide, with 30-40 cm spacing between beds.
- Check the soil pH. If the pH is lower than 5.5, add dolomitic lime at a rate of 1.5 tons per hectare by spreading it on the raised beds 2-4 weeks before planting. Leave the raised beds for 1-2 weeks before they are ready for planting.
3. Basic Fertilization
To improve soil fertility, add organic fertilizer before planting. Apply manure at a rate of 20-30 tons per hectare by spreading it on the raised beds. Additionally, you can mix the manure with NPK fertilizer (25 kg) and TSP fertilizer (100 kg) per 100 kg of manure to increase the nutrient content in the soil.
4. Silver Mulch Installation
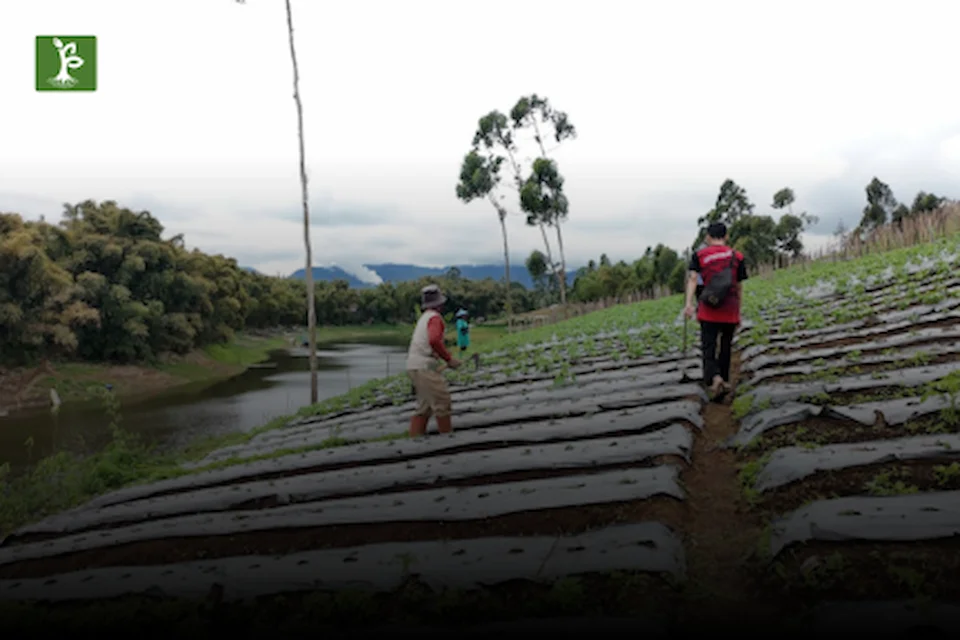
The installation of silver mulch is important for higher chili production and better fruit quality. The benefits of using mulch include maintaining soil temperature and humidity, helping the plants grow well and preventing them from drying out, minimizing the evaporation of chemical fertilizers, preventing weed growth, and reducing pest and disease problems.
Mulch should be installed after the raised beds are formed and fertilization has been done. It is best to install the mulch between 9:00 AM and 2:00 PM, as it will stretch more easily and cover the bed surface. Here’s how to install the mulch:
- Lay the mulch with the silver side facing up. Bamboo sticks should be placed at both ends of the mulch to keep it covering the raised beds
- Let the beds rest for 5-7 days so that the soil can absorb nutrients from the fertilizers
- A day before planting, make holes in the mulch with a diameter of 10 cm, with plant spacing of 40 x 60 cm or 50 x 60 cm.
5. Seed Preparation and Treatment
Chili seeds should be selected from good varieties that are healthy and disease-free. The seeds selected should be intact and without defects. To speed up seed germination, soak the chili seeds in warm water at a temperature of 40°C for 12 hours. The purpose of soaking the seeds in warm water is to break their dormancy, making it easier for the seeds to germinate once planted in the soil.
6. Planting Chili Peppers

a. Seedling
- Chili seeds need to be pre-germinated for 3-4 weeks. Germination can be done in seed trays or polybags (10 cm diameter) using a planting medium made from a mixture of soil and compost/organic fertilizer in a 1:1 ratio
- First, moisten the planting medium, then create small holes and insert the chili seeds at a depth of 0.5 cm, covering them with a thin layer of soil
- Ensure the chili plants have shade to protect them from heat and rain, and install nets to prevent pests from attacking the plants
- Cover with banana leaves for 2 days to reduce humidity and speed up germination.
b. Transplanting
- Chili seedlings should be transplanted to the raised beds after 3-4 weeks or when they have 3-4 leaves. Choose healthy seedlings with fresh appearances and free from pests and diseases
- Transplanting should be done in the morning between 6:00-10:00 AM or in the afternoon between 3:00-5:00 PM
- First, water the raised beds. Then, create planting holes with a spacing of 40 x 60 cm or 50 x 60 cm, but make sure to adjust the spacing based on the variety being planted
- Carefully move the seedlings along with their growing medium, about 3 cm from the germination tray
- Plant the seedlings in the holes, add a bit of soil, and compact it to ensure the seedlings stay upright
- Water the seedlings, making sure they receive enough moisture
- After planting, install bamboo stakes that are 1-1.25 meters tall, spaced 10 cm from the plant stems. The stakes should be inserted into the ground 25-30 cm deep. Be careful when inserting the stakes to avoid damaging the plant roots
- Tie the chili plant stems to the bamboo stakes with raffia twine to keep the plants upright.
7. Thinning
Thinning is the process of replacing weak plants (damaged, stunted, or dead) with healthier ones. Try to use new seedlings that are the same age, so the chili plants grow uniformly and simultaneously. Thinning is done 7-14 days after planting (DAP).
8. Regular Watering
Watering should be done regularly in the morning and evening. Make sure to water sufficiently, but not excessively, to avoid chili plants rotting.
9. Supplemental Fertilization
Supplemental fertilization is important because chili plants require adequate nutrients to support their growth. Supplemental fertilization is done at 3, 6, and 9 weeks after planting (WAP). Fertilizers that can be used include urea (NPK) at a dosage of 200-300 kg/ha, KCl at 250-300 kg/ha, and ZA at 300-400 kg/ha.
Fertilization is done three times, with each application consisting of ⅓ of the total dose each week. Apply the fertilizer by digging up the soil on the left and right sides of the plants, then cover it immediately to prevent nutrient loss from evaporation.
10. Weeding
Weeding should be done regularly to remove weeds around the plants. Weeds should be pulled out because they can interfere with plant growth. Additionally, weeds compete with chili plants for nutrients in the soil. Weeding can be done 30-60 days after planting (DAP), but if weeds are spotted during plant monitoring, they should be removed as soon as possible.
11. Pest and Disease Control

Monitoring chili plants is necessary so that pest and disease control can be carried out quickly and effectively. Common pests that attack chili plants include thrips (Thrips parvispinus), armyworms (Spodoptera litura), whiteflies (Bemisia tabaci), aphids (Aphis spp.), and mites (Polyphagotarsonemus latus and Tetranychus spp.).
Common diseases that often affect chili plants include anthracnose (Colletotrichum capsici, Colletotrichum gloeosporioides), leaf spot (Cercospora capsici), yellow leaf curl virus (Geminivirus spp.), Fusarium wilt (Fusarium oxysporum), bacterial wilt (Ralstonia solanacearum), and mosaic virus (Begomovirus spp.).
12. Chili Harvesting

Chili peppers can be harvested 60-75 days after planting (DAP). The signs that chilies are ready to harvest include fully ripe fruit, bright red, reddish-green, or dark reddish color, and a fresh appearance. Harvesting can be done every 3-7 days, either in the morning or afternoon.
The harvesting interval lasts for 12-20 rounds until the plant reaches 6-7 months old. Chilies can be harvested by picking the fruit along with its stem using scissors or by hand. Be sure to pick the fruit with its stem so that the chili doesn’t rot quickly.
13. Post-Harvest Treatment
After harvesting, gather the chilies in a basket. Clean the chilies from any remaining soil or dirt using a cloth. The chilies should undergo a curing process. The purpose of curing is to enhance the color of the chili, making it more appealing for the market.
This process involves laying the chilies in a shaded area to allow the heat to escape. Afterward, the chilies should be sorted—separating the marketable chilies from those that are not. The good chilies should be packaged in airtight containers.


