

Land preparation is one of the techniques for cultivating coffee plants that determines the success of coffee planting. Land preparation is necessary so that the seeds that have been transferred to the land can quickly grow well and are immediately able to face very diverse land environmental conditions, especially in less favorable environments.
Planting areas can come from new openings (reserved forests), abandoned land, moorland, rejuvenation areas, conversions or rotations from other commodities. The main land preparation activities include:
1. Land Clearing
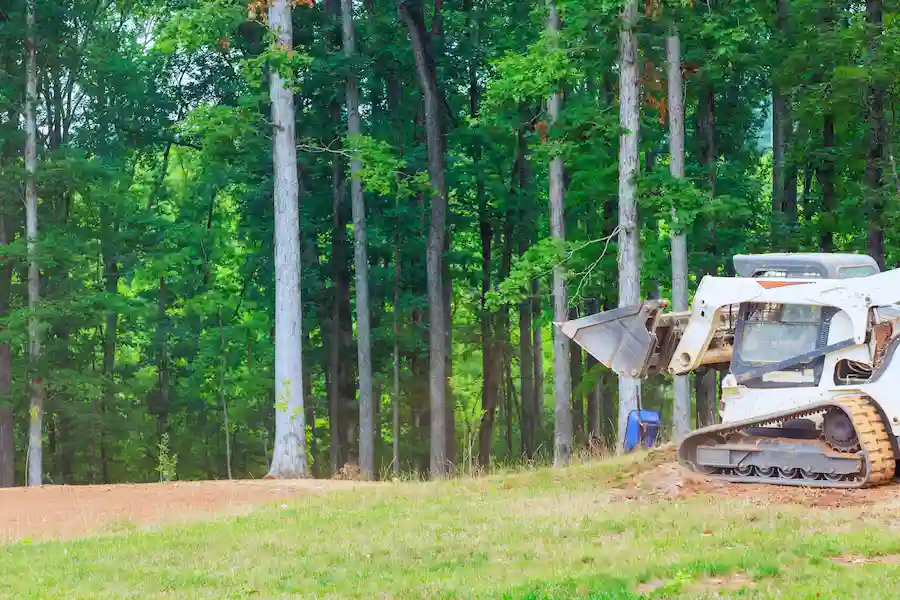
Land clearing is an important initial stage in agricultural land preparation, aimed at clearing the land of previous crop residues. This process involves several steps that require a lot of hard work and time. The following are the main stages in land clearing:
a. Tree and Stump Removal
Trees, bushes, and stumps along with their roots must be dismantled and removed. This process often requires extra time and effort.
b. Purification of Perdu Plants and Weeds
Disturbing shrubs and weeds must be removed to avoid competition with the plants to be planted.
c. Land Clearing Without Burning
Land clearing is carried out without using fire, to preserve the environment. Herbicide use should also be done judiciously, only when necessary.
d. Maintenance of Woody Plants
Some woody plants with a diameter of less than 30 cm can be left as permanent shelter. It is recommended that these trees are left with a total of 200-500 trees per hectare and planted in a north-south direction. If possible, this patron tree has a high economic value.
e. Wood Storage
The wood resulting from demolition should be stacked in one place at the edge of the garden to make it easier to manage and not disturb the area to be planted.
f. Weed Control
Weeds can be removed manually or by using herbicides. The choice of method depends on the type of weed present and must be done wisely so as not to damage the environment.
g. Construction of Production Roads and Drainage Channels
To facilitate mobility and avoid puddles of water, it is important to create paths and drainage channels.
h. Making terraces on land with a slope of more than 30%
On land that has a slope of more than 30%, terraces need to be made to prevent erosion and ensure the smooth running of the agricultural process.
2. Control of weeds
Controlling thatch is very important to prepare optimal land for coffee plants. The following are several control methods that can be applied manually, mechanically, technically, or with an integrated approach.
a. Manual Control
The manual method is a simple method that can be done without heavy equipment. The first step is to lay down the leaves and stems of the reeds using a board, piece of wood, or drum.
This process will cause the reeds to dry and die, without stimulating the growth of new shoots from the rhizomes. In addition, these dead plants can function as mulch, which helps maintain soil moisture.
b. Mechanical Control
Mechanical control is carried out by tillage which can reduce the number of reeds on the land. Removing the reeds will reduce competition with coffee plants, although this method is temporary and needs to be done regularly, at least once a month. Once the reeds are under control, the land is ready to be planted with coffee at the appropriate stages.
c. Control with Technical Culture
The technical culture method uses legume cover crops (PTL) which can help control the growth of reeds. Several types of PTL that are suitable for tropical areas include Centrosema pubescens, Pueraria javanica, and Mucuna sp.
The first step is to spray herbicide on the reeds in an aisle style, with an aisle width of 2 meters and a distance between aisles of 4 meters. After the reeds are dry, make two planting furrows 5 cm deep with a distance of 70 cm between the furrows.
Next, PTL seeds are mixed with SP-36 fertilizer at 24 kg/ha and sown in the furrows that have been made. After that, cover the groove with 1 cm thick soil. When the PTL canopy grows, it will cover the reeds, causing the plant to die.
d. Integrated Control with Minimum Tillage and Use of Herbicides
An integrated approach involves control with minimum tillage and use of herbicides. The first step is to spray a systemic herbicide on the reeds that are actively growing.
After the reeds are dead and dry, flatten them by laying them down. Then, annual plants can be planted by precropping. At the same time, the land is ready to be planted with shade plants and coffee, following the stages described previously.
3. Planting Distance and Planting Holes

When planting coffee, spacing and planting holes are very important to support optimal plant growth. On sloping land, planting is done following the contour or terrace, while on flat land with a slope of less than 30%, the rows of plants follow the North-South direction. Plant spacing is adjusted to the type of coffee planted as follows:
- Dwarf Type Arabica Coffee (for example: Kartika 1 and Kartika 2): Planting distance 2.0 m x 1.5 m.
- Dwarf Type Arabica Coffee (for example: AS 1, AS 2K, Sigarar Utang): Planting distance 2.5 m x 2.0 m.
- Tall Type Arabica Coffee (for example: S 795, Gayo 1, Gayo 2): Plant spacing 2.5 m x 2.5 m or 3.0 m x 2.0 m.
- Robusta Coffee: Planting distance 2.5 m x 2.5 m or 3.0 m x 2.0 m.
- Liberica Coffee: Planting distance 3.0 m x 3.0 m or 4.0 m x 2.5 m.
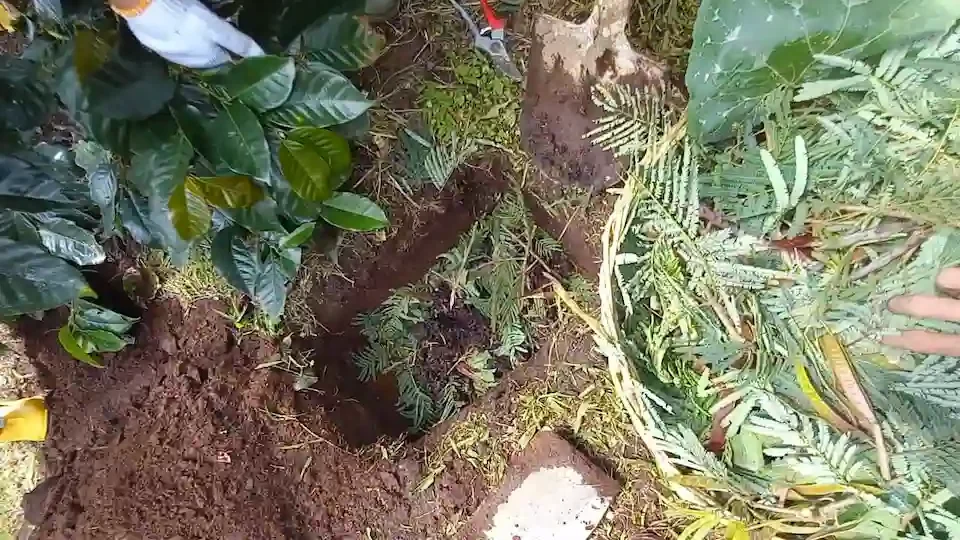
The size of the planting hole is also very important and depends on the texture of the soil. For heavier soil, the hole size must be larger. The ideal size of the planting hole is 60 cm x 60 cm at the surface and 40 cm x 40 cm at the bottom, with a depth of 60 cm. Holes should be made about 6 months before planting coffee to ensure thorough preparation.
For less fertile soil, it is recommended to add green manure and manure. After making the hole, make sure to close it 3 months before planting the coffee, ensuring that stones, debris and root debris do not enter the planting hole.
During the land preparation process, empty areas can be used to plant annual plants as pre-cropping. This type of crop can be taro, sweet potato, corn, or beans, which are selected based on farmer needs, market opportunities, and local microclimate. Thus, all these steps help create ideal conditions for healthy and productive coffee growth.
4. Erosion Control
Erosion is one of the main causes of soil degradation, especially in coffee plantations located on land with a fairly high slope. This problem often appears during the land preparation period and the time of Crops Not yet Produced (TBM), when the land is still open and vulnerable to damage due to rainwater.
However, when the coffee plant has matured and its crown covers the entire surface of the ground, the risk of damage due to rainwater will be significantly reduced.
On land with a high slope, surface flow becomes more intense and triggers erosion. Therefore, erosion prevention efforts are needed that are appropriate to the slope conditions of the land. The following are erosion control strategies based on the slope of the land:
- Slope < 8%: No need to build a terrace, just dig a rorak (small channel to control water flow).
- Slope 8–45%: Requires a continuous bench terrace or mountain belt terrace accompanied by ridges.
- Slope > 45%: The land should not be used for coffee cultivation. This land is more suitable for planting timber trees or allocated as reserve/protected forest. However, if it is still used for coffee, an individual terrace is required.
Types and Techniques for Making Terraces
a. Terrace Bench
Bench terraces are created by cutting a slope and leveling the ground at the bottom to form a stair-like structure. This terrace is not suitable for land that is prone to landslides or has shallow soil depth. When making a bench terrace, it is necessary to pay attention to aspects of soil fertility so that it continues to support plant growth.
b. Individual Terrace
Individual terraces are a leveling of land around the plant with a diameter of about 1–1.5 meters. This type of terrace is suitable for very sloping land (slope more than 45%).
c. Mountain Belt Terrace
Stages of making mountain belt terraces include:
- Make contour lines and mark them with a marker.
- Adjust the distance between contour lines to plant spacing.
- Start leveling the land from the topmost stake.
- Hoe the soil 1 meter in front of the contour line and pull it back to form a terrace butt.
- Compact the excavated soil so that it is not easily carried away by rainwater.
5. Rorak
Caring for coffee plants so that they remain productive is every farmer’s dream. However, challenges such as soil erosion, poor drainage and reduced fertility are often major barriers. It turns out that a simple but effective solution has long been known in coffee cultivation practice, namely the rorak hole.
This technique not only helps manage rainwater and maintain soil fertility, but also supports overall land conservation. What exactly are rorak holes and how their application can bring great benefits to coffee plants, let’s discuss it!
Rorak holes are excavations made near the main coffee plant to accommodate organic fertilizer and function as a drainage channel. This technique is designed to manage rainwater by collecting and absorbing it into the soil, slowing surface runoff, preventing erosion, and conserving plantation land.
On dry land, it is recommended to make 30 rorak holes per hectare with a size of 120 x 40 x 40 cm. The ideal distance between the rorak and the main stem of the plant is around 75–100 cm, adjusted to the growth of the plant and the width of the terrace available.
On sloping to slightly sloping land, the vertical distance between rorak ranges from 10–15 meters, while on steep slopes the distance is closer together, around 3–5 meters.
a. Rorak Charging and Maintenance
Rorak is filled to ⅔ of its depth with organic material such as litter, pruning of coffee twigs, weeding, mature compost, or manure. After filling, the rorak is covered with soil or transparent plastic to maintain moisture, speed up the decomposition process, and create optimal conditions for compost formation.
The organic material in the rorak will decompose naturally and within about one year it is usually full to the level of the soil surface. If the first rorak is full, create a new rorak on the other side of the plant to continue this system on an ongoing basis.
b. Utilization of Compost from Rorak
Compost produced from rorak can be used as organic fertilizer by sprinkling it around the disks of coffee plants, at a distance of 1 meter from the main stem. This area should also be kept free of weeds to support optimal plant growth.
To speed up the decomposition process, add decomposer or decomposer solution according to the dosage. Pour this solution onto the organic material in the rorak, then cover it with plastic covered with soil 5–10 cm thick.
Compost can be harvested within 4–6 weeks, but make sure it is mature before using to avoid the risk of spreading disease to plants. By implementing the correct rorak hole technique, farmers can not only increase soil fertility and crop yields, but also contribute to sustainable land conservation.


